Monitor Purity Issues
This article is going to cover a very common problem with cathode ray tube (CRT) monitors. This issue is often discussed but rarely properly fixed or addressed in complete form. We’re going to cover all aspects of this issue and help you diagnose and hopefully fix your monitor purity issues. Parts of this article may be a little technical, but continue reading as there are some easy fixes included…
What is purity?
CRT monitors are additive color systems, meaning that all colors are created by adding a percentage of primary colors together. These primary colors are Red, Green and Blue.
White = ( R:100% + G:100% + B:100% )
Black = ( R:0% + G:0% + B:0% )
Red = ( R:100% + G:0% + B:0% )
Green = ( R:100% + G:100% + B:0% )
Blue = ( R:0% + G:0% + B:100% )
If your monitor exhibits any one of the following impairments, you have a problem with purity
In the neck of each CRT is a primary color electron gun. The electrons are directed up/down and left/right by way of a magnetic coil located at the base of the CRT glass. When an image can be displayed in perfect geometry and color, the CRT is considered to be calibrated as pure.
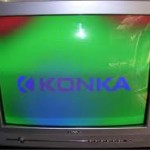
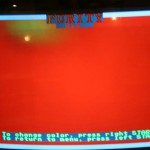
The best example of purity is displaying a full screen of each primary color. If each color can be displayed perfectly square (4×3 on standard CRT) and without color splotches, then the CRT is calibrated correctly (for that region of the world) and that there are no environmental impairments affecting the direction of the internal electron guns. Purity is adjusted by moving the location of the windings used to redirect the electron gun beams (yoke). More on this later.
What is Convergence?
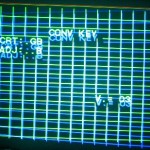
Convergence plays hand in hand with purity in creating an image of expected color and with perfect alignment. We know that each color is controlled by a separate electron gun. Each gun is located in the neck of the CRT, but not in the same location. So slight adjustments need to be made so that each gun illuminates the same exact location on the CRT to create a single pixel element.
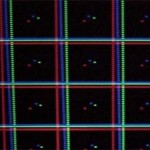
Here is are a couple examples of very poor convergence. You can also see the distinct primary elements.
Ok, so now what?
So, how did we get here anyway? Why would my monitor look like this?
Simple Fix Convergence
First, let’s start with convergence problems. Convergence is set and locked in place in the factory. Arcade games typically get man-handled and relocated every couple years to new locations. Operators are not usually very gentile with these machines and sometimes the glue which holds the yoke in place comes loose. Sometimes convergence can easily be fixed by re-centering the yoke with the rubber wedges and gluing it back in place. If that doesnt work, it is possible the convergence rings were broken off or knocked out of position. They too are glued in place and if they havent broken off, can be easily be slid back in position. The manufacturer usually aligned these and marked them with ink or glue so relocating them back should be very simple. If they have broken off, you will need to look into having this corrected by a professional or replacing the monitor (which is probably your best course of action).
Simple Fix Purity
All monitors have a purity fixer built in. It’s called a de-gausser. Most all monitors have built in de-gaussing circuits that automatically run every time a monitor is turned on. However, this only happens when a monitor is COLD. So, if you are seeing this problem, shut off your game and wait about an hour. When you turn it back on, you should hear a funny twang sound. That is the degauss circuit attempting to rid the picture tube of unwanted magnetic interference.
Sometimes, when relocating an arcade game, the monitor will pick up stray magnetization. Try running the automatic degauss circuit a couple times. If the splotch has not been corrected, you may be one of what we call “the 1%”
Environmental Fix Purity
Sometimes, you have to adjust for environmental conditions that cannot be fixed. You may have an I-beam in the wall or ceiling that is locally augmenting the Earth’s natural magnetic field. Sometimes, it is in the ground below you. Either way, this too can be overcome.
First, relocate the machine to another part of the room OR turn the machine temporarily 90 degrees. Re-run the automatic degauss circuit a couple of times and see if this condition goes away.
If it works, then you have 2 choices:
1) Relocate the machine or turn it 90 degrees.
2) Compensate with magnets
Magnet Fix Purity
Ok, so we don’t love this solution because it is a trial and error solution, but it works – and nobody ever knows to do this. This method also requires a little dexterity and risk of electric shock. So, if you are not familiar with electronics or qualified for working with high voltages, please find someone who is.
First, you need some thin flexible magnet material. Not too strong, typically fridge magnet strength. A strip of flexible magnet can be purchaed in Home Depot or a craft section used for making picture frames etc.
The idea here is to use the magnets on the back side of the monitor to compensate for the area that is not pure. Experiement by moving the magnet along the back side of the glass tube. The closer to the center (yoke), the more compensation. Turn and spin the magnet until the blotch goes away and then glue the magnet in place.
You may see other magnets already glued in place by the factory. Use that as a guide for size and location.
Again – do this with the monitor OFF and wait 15 minutes between each attempt so that high voltage is discharged. Do all adjustments to the monitor in the position where the game will reside or you’ll be chasing your tail.
If you have any questions, please comment on this article
Tags: arcade, blotch, convergence, CRT, degauss, purity, restore, RGB

